CURD【增删改查】
半塘 2024/1/7 MyBatis框架
# 1、参数传递
# 1.1、传参案例
先看个简单案例,在UserMapper增加一个根据id获取用户信息的接口,对应UserMapper.xml增加查询方法。
@Mapper
public interface UserMapper {

    UserPO getUserById(int id);

}
1
2
3
4
5
6
2
3
4
5
6
<select id="getUserById" resultType="com.xygalaxy.pojo.UserPO" parameterType="int">
    select * from user where id=#{id}
</select>
1
2
3
2
3
- parameterType代表接收参数类型
- 通过#{}接收参数
# 1.2、#{}和${}
除了#{}可以接收参数,还有${}的方式也可以接收参数。
- #{}和${}的区别
#{}
- #{}是预编译处理。
- #{}表示一个占位符号 相当于 jdbc中的
?符号,#{}实现的是向prepareStatement中的预处理语句中设置参数值,sql语句中#{}表示一个占位符即?。 - #{}将传入的数据都当成一个字符串,会对自动传入的数据加引号。比如传id为12就是:
select * from user where id='12'。 - sql语句中只有一个参数,此时Mapper中参数名称可以随意定义,案例中Dao接口传的是id,但是SQL语句中可以随意,比如:
select * from user where id=#{userId},但如果是多个参数就需要对应了。
${}
- ${}是直接的字符串替换。
- ${}将传入的数据直接显示生成在sql中。比如传id为12就是:
select * from user where id=12。 - ${value}中的value值类型需要对应,因为${}不会自动进行jdbc类型转换。
- 应用场景
- 尽量用#{}方式,因为${}方式可能会引起sql注入。
- 动态SQL中表名用${}。比如:
select * from ${tableName},不确定表名可以用。 - 升降序中使用${},在拼接 asc 和 desc时,要使用 ${} 占位符。
- 批量删除时,使用${}。
- 主要还是判断是字符串占位符(用#{}),还是字符串替换(用${})。
# 1.3、SQL注入
SQL注入是一种攻击技术,攻击者利用它向数据库查询中注入恶意SQL代码,从而执行未经授权的数据库操作。这种攻击通常发生在应用程序没有正确验证或转义用户输入的情况下。
案例
-- 正常情况下
SELECT * FROM users WHERE username = 'inputUsername' AND password = 'inputPassword';

-- 如果用${}传参可能会变成这样,${username} = 'inputUsername' OR '1' = '1'
SELECT * FROM users WHERE username = 'inputUsername' OR '1' = '1' AND password = 'inputPassword';
1
2
3
4
5
2
3
4
5
通过在条件中注入其他的一些条件这样也可以满足条件,能查询到用户信息,代表登录成功,这样就登录该用户账号了。
# 2、新增
本章节为了快速延时,将不再加入Service层,直接通过Mapper层操作。
# 2.1、新增用户案例
- 新增saveUser方法
@Mapper
public interface UserMapper {

    int saveUser(UserPO userPO);

}
1
2
3
4
5
6
2
3
4
5
6
- UserMapper.xml新增saveUser
<mapper namespace="com.xygalaxy.mapper.UserMapper">

    <insert id="saveUser" parameterType="com.xygalaxy.pojo.UserPO">
        <selectKey keyProperty="id" resultType="Integer" order="BEFORE">
            select if(max(id) is null, 1, max(id) +1) as id from user
        </selectKey>
        insert into user(id,username,password,email) values(#{id},#{username},#{password},#{email})
    </insert>

</mapper>
1
2
3
4
5
6
7
8
9
10
2
3
4
5
6
7
8
9
10
- 新增测试类UserCrudController
@RunWith(SpringJUnit4ClassRunner.class)
@ContextConfiguration(classes = ScanConfig.class)
public class UserCrudController {

    @Autowired
    private UserMapper userMapper;

    @Test
    public void testAdd(){
        UserPO userPO = new UserPO(null,"testUser","123456","123456@qq.com");
        int result = userMapper.saveUser(userPO);

        System.out.println("result => "+result);
        System.out.println("allUserList => "+userMapper.getUserList());
    }

}
1
2
3
4
5
6
7
8
9
10
11
12
13
14
15
16
17
2
3
4
5
6
7
8
9
10
11
12
13
14
15
16
17
测试结果 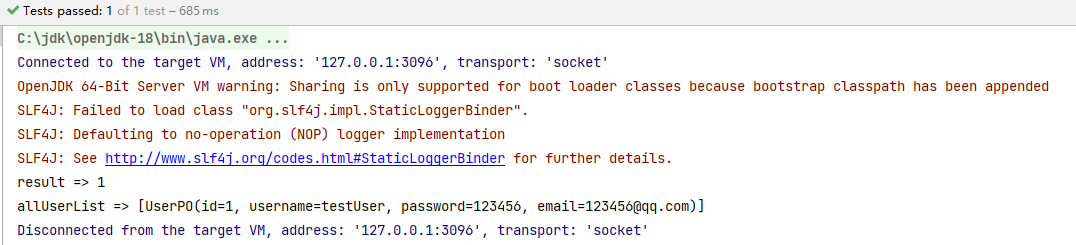
# 3.2、新增案例说明
如果不使用数据库的自增时。Mybatis提供了一种自增主键方式,可以这样做,会代替UserPO中的注解id。
<selectKey keyProperty="id" resultType="Integer" order="BEFORE">
    select if(max(id) is null, 1, max(id) +1) as id from user
</selectKey>
1
2
3
2
3
- keyProperty:代表主键的属性名
- resultType:返回类型
- order:order的属性可以被设置为BEFORE或AFTER。如果设置为BEFORE,那么它会首先执行元素中的配置来设置主键,然后执行插入语句;如果设置为AFTER,那么它会首先执行执行插入语句,然后执行元素中的配置内容;
<insert id="saveUser" parameterType="com.xygalaxy.pojo.UserPO">
    insert into user(id,username,password,email) values(#{id},#{username},#{password},#{email})
</insert>
1
2
3
2
3
- insert标签:插入语句标签。
- id="saveUser":对应UserMapper接口中方法。
- parameterType:传入参数,Mybatis会自动解析属性值,直接用#{属性名称}或者${属性名称}读取即可。
- 返回结果为int类型,代表新增成功条数。
# 3、删除
# 3.1、删除用户案例
- 新增deleteUserById方法
@Mapper
public interface UserMapper {

    int deleteUserById(int id);

    // 批量删除方式1
    int deleteUserByIds(String ids);

    // 批量删除方式2
    int deleteUserByIds2(List<Interge ids);
}
1
2
3
4
5
6
7
8
9
10
11
2
3
4
5
6
7
8
9
10
11
- UserMapper.xml新增deleteUserById
<delete id="deleteUserById" parameterType="int">
    delete from user where id = #{id}
</delete>

<!-- 批量删除 -->
<delete id="deleteUserByIds" parameterType="int">
    delete from user where id in (${ids})
</delete>

<!-- 批量删除方式2 -->
<delete id="deleteUserByIds2" parameterType="int">
    delete from user where id in
    <foreach collection="ids" item="id" open="(" separator="," close=")">
        #{id}
    </foreach>
</delete>
1
2
3
4
5
6
7
8
9
10
11
12
13
14
15
16
2
3
4
5
6
7
8
9
10
11
12
13
14
15
16
- 测试
@Test
public void testDelete(){
    int result = userMapper.deleteUserById(1);

    System.out.println("result => "+result);
    System.out.println("allUserList => "+userMapper.getUserList());

    // 批量删除,方式1
    userMapper.deleteUserByIds("1,2,3,4");
    // 批量删除,方式2
    List<Integer> idList = new ArrayList<>();
    idList.add(1);
    idList.add(2);
    userMapper.deleteUserByIds2(idList);
}
1
2
3
4
5
6
7
8
9
10
11
12
13
14
15
2
3
4
5
6
7
8
9
10
11
12
13
14
15
测试结果 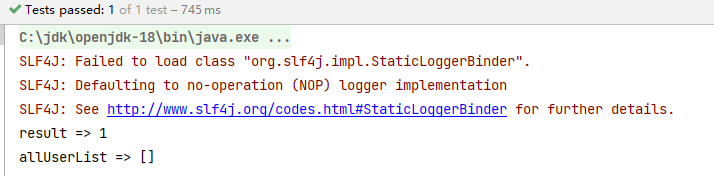
# 3.2、删除案例说明
<delete id="deleteUserById" parameterType="int">
    delete from user where id = #{id}
</delete>
1
2
3
2
3
- delete标签:删除语句标签。
- id="deleteUserById":对应UserMapper接口中方法。
- parameterType:传入参数,Mybatis会自动解析属性值,直接用#{属性名称}或者${属性名称}读取即可。
- 返回结果为int类型,代表新增成功条数。
- 批量删除方式2后面在动态SQL中会有详解,这里就当成一个for循环拼接就行。
# 4、修改
# 4.1、更新用户案例
- 新增deleteUserById方法
@Mapper
public interface UserMapper {

    int updateUserById(UserPO userPO);

}
1
2
3
4
5
6
2
3
4
5
6
- UserMapper.xml新增updateUserById
<update id="updateUserById"  parameterType="com.xygalaxy.pojo.UserPO">
    update user where id = #{id}
</update>
1
2
3
2
3
- 测试
@Test
public void testUpdate(){
    UserPO userPO = new UserPO(1,"updateUser","323232","222@qq.com");
    int result = userMapper.updateUserById(userPO);

    System.out.println("result => "+result);
    System.out.println("allUserList => "+userMapper.getUserList());
}
1
2
3
4
5
6
7
8
2
3
4
5
6
7
8
测试结果 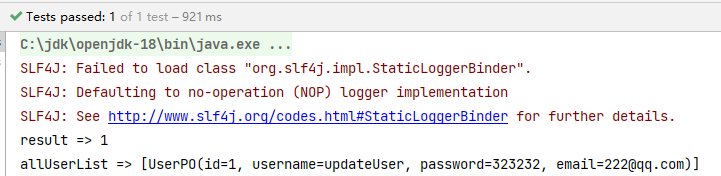
# 4.2、更新案例说明
<update id="updateUserById"  parameterType="com.xygalaxy.pojo.UserPO">
    update user set username=#{username},password=#{password},email=#{email} where id = #{id}
</update>
1
2
3
2
3
- update标签:删除语句标签。
- id="updateUserById":对应UserMapper接口中方法。
- parameterType:传入参数,Mybatis会自动解析属性值,直接用#{属性名称}或者${属性名称}读取即可。
- 返回结果为int类型,代表新增成功条数。
# 5、查询
前面我们通过xml的配置方式演示了增删改操作,查询的话,通过注解方式,就跟之前案例中使用@Select。
# 5.1、增加log4j日志
在查询之前,我们先增加一下log4j日志,方便我们查看sql语句。
- 新增日志依赖
<!-- 添加slf4j日志api,该日志之前已经增加-->
<dependency>
    <groupId>org.slf4j</groupId>
    <artifactId>slf4j-api</artifactId>
    <version>1.7.20</version>
</dependency>

<!-- log4j -->
<dependency>
    <groupId>log4j</groupId>
    <artifactId>log4j</artifactId>
    <version>1.2.17</version>
</dependency>
<!-- slf4j-log4j12 日志适配器 -->
<dependency>
    <groupId>org.slf4j</groupId>
    <artifactId>slf4j-log4j12</artifactId>
    <version>1.7.25</version>
</dependency>
1
2
3
4
5
6
7
8
9
10
11
12
13
14
15
16
17
18
19
2
3
4
5
6
7
8
9
10
11
12
13
14
15
16
17
18
19
- resources下增加log4j.properties配置
log4j.rootLogger=DEBUG, stdout
log4j.appender.stdout=org.apache.log4j.ConsoleAppender
log4j.appender.stdout.layout=org.apache.log4j.PatternLayout
log4j.appender.stdout.layout.ConversionPattern=%5p %d %C: %m%n

log4j.logger.java.sql.ResultSet=INFO
log4j.logger.org.apache=INFO
log4j.logger.java.sql.Connection=DEBUG
log4j.logger.java.sql.Statement=DEBUG
log4j.logger.java.sql.PreparedStatement=DEBUG
1
2
3
4
5
6
7
8
9
10
2
3
4
5
6
7
8
9
10
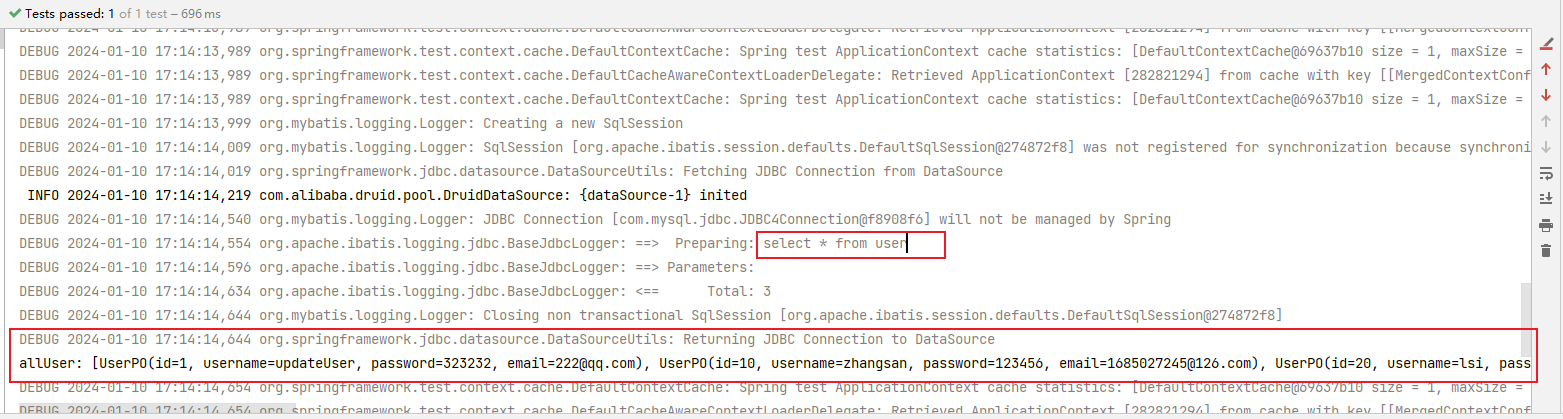
随便执行一个查询,看看日志。
# 5.2、查询所有用户
// UserMapper接口
@Select("select * from user")
List<UserPO> selectAllUserList();

// 测试
@Test
public void testSelectAllUserList(){
    System.out.println("selectAllUserList => "+userMapper.selectAllUserList());
}
1
2
3
4
5
6
7
8
9
2
3
4
5
6
7
8
9
# 5.3、条件查询用户
// UserMapper接口
@Select("select * from user where id = #{id}")
List<UserPO> selectUserById(int id);

// 测试
@Test
public void testSelectUserById(){
    System.out.println("selectUserById => "+userMapper.selectUserById(10));
}
1
2
3
4
5
6
7
8
9
2
3
4
5
6
7
8
9
# 5.4、Like模糊查询用户
// UserMapper接口
@Select("select * from user where username like CONCAT('%', #{name}, '%')")
List<UserPO> selectUserByName(String name);

// 测试
@Test
public void testSelectUserByName(){
    System.out.println("selectUserByName => "+userMapper.selectUserByName("zh"));
}
1
2
3
4
5
6
7
8
9
2
3
4
5
6
7
8
9
使用xml配置方式还有另外一种方式,通过<bind>绑定
// UserMapper接口
List<UserPO> selectUserByName2(String name);
1
2
2
UserMapper.xml
通过bind标签将name拼接为%name%,并currentName表示
<select id="selectUserByName2" resultType="com.xygalaxy.pojo.UserPO">
    <bind name="currentName" value="'%'+name+'%'"/>
    select * from user where username like #{currentName}
</select>
1
2
3
4
2
3
4
@Test
public void testSelectUserByName2(){
    System.out.println("selectUserByName2 => "+userMapper.selectUserByName2("ls"));
}
1
2
3
4
5
2
3
4
5
# 5.5、聚合函数查询
// UserMapper接口
@Select("select count(*) from user")
int selectUserCount();

@Select("select sum(id) from user")
String selectUserSumId();


// 测试
@Test
public void testSelectUserCount(){
    System.out.println("selectUserCount => "+userMapper.selectUserCount());
}

@Test
public void testSelectUserSumId(){
    System.out.println("selectUserSumId => "+userMapper.selectUserSumId());
}
1
2
3
4
5
6
7
8
9
10
11
12
13
14
15
16
17
18
2
3
4
5
6
7
8
9
10
11
12
13
14
15
16
17
18
# 5.6、Map封装结果
// UserMapper接口
@Select("select * from user")
List<Map> selectUserToMap();

// 测试
@Test
public void testSelectUserToMap(){
    List<Map> maps = userMapper.selectUserToMap();
    System.out.println("selectUserToMap => "+maps);
}
1
2
3
4
5
6
7
8
9
10
2
3
4
5
6
7
8
9
10
# 5.7、多参查询
报错案例
@Select("select * from user where username like CONCAT('%', #{name}, '%') and email like CONCAT('%', #{email}, '%')")
List<UserPO> selectUserMultiparameter(String name,String email);
1
2
2
查询多参报错

- MyBatis取值方式1
- 在低版本的MyBatis中,使用的是 #{0} #{1} ... 来取值
- 高版本的mybatis用的是 #{arg0} #{arg1}
@Select("select * from user where username like CONCAT('%', #{arg0}, '%') and email like CONCAT('%', #{arg1}, '%')")
List<UserPO> selectUserMultiparameter(String name,String email);
1
2
2
查询多参取值方式1结果

- MyBatis取值方式2
- 使用@Param注解
- 可以在mapper不使用 #{arg0} #{arg1},使用自定义的名字,这就需要使用到@Param注解
// UserMapper接口
@Select("select * from user where username like CONCAT('%', #{arg0}, '%') and email like CONCAT('%', #{arg1}, '%')")
List<UserPO> selectUserMultiparameter(String name,String email);

// 测试
@Test
public void testSelectUserMultiparameter2(){
    System.out.println("selectUserToMap => "+userMapper.selectUserMultiparameter2("s","168"));
}
1
2
3
4
5
6
7
8
9
2
3
4
5
6
7
8
9