Spring框架配置简化过程
Spring的IOC和AOP思想的实现,从框架的设计角度而言,极大的简化开发。但是对于前期的Spring而言,还需要大量的配置来实现。Spring不断的发展,从Spring更新的历史版本上可以看出 这个过程在不断的被优化,SpringBoot的推出也是极大的帮助了我们简化开发流程。
# 1、配置简化过程概览
Spring配置优化流程变化如下:
XML配置方法 -> Java配置方式 -> 注解配置方式 -> SpringBoot托管配置方式
这个优化配置过程不是说完全替代,而是相辅相成的,每个阶段都有其存在的意义。
接下来我们就看下各个配置方式的实现,从中体会整个简化过程。
# 2、XML配置方法
创建接口及实现
// 接口
public interface AopService {
    public void sayOne();
}

// 实现
public class AopServiceImpl implements AopService {
    @Override
    public void sayOne() {
        System.out.println("这是One语句");
    }
}
2
3
4
5
6
7
8
9
10
11
12
创建aopSpring.xml配置文件
<?xml version="1.0" encoding="UTF-8"?>
<beans xmlns="http://www.springframework.org/schema/beans"
       xmlns:xsi="http://www.w3.org/2001/XMLSchema-instance"
       xsi:schemaLocation="http://www.springframework.org/schema/beans
    http://www.springframework.org/schema/beans/spring-beans.xsd">

    <bean id="aopServiceImpl" class="com.xygalaxy.service.impl.AopServiceImpl"></bean>

</beans>
2
3
4
5
6
7
8
9
测试获取aopServiceImpl对象
public class AopController {
    @Test
    public void testAop(){
       ApplicationContext ac = new ClassPathXmlApplicationContext("aopSpring.xml");
       AopServiceImpl aopService = ac.getBean(AopServiceImpl.class);
       aopService.sayOne();
    }
}

/**
 * 输出结果:这是One语句
 */
2
3
4
5
6
7
8
9
10
11
12
# 3、Java配置方式
创建接口及实现
// 接口
public interface AopService {
    public void sayOne();
}

// 实现
public class AopServiceImpl implements AopService {
    @Override
    public void sayOne() {
        System.out.println("这是One语句");
    }
}
2
3
4
5
6
7
8
9
10
11
12
创建配置类
@Configuration
public class AopConfig {

    @Bean("aopServiceImpl")
    public AopServiceImpl getAopService(){
        AopServiceImpl aopService = new AopServiceImpl();
        return aopService;
    }

}
2
3
4
5
6
7
8
9
10
测试获取aopServiceImpl对象
public class AopController {
    @Test
    public void testAop(){
       ApplicationContext ac = new AnnotationConfigApplicationContext(AopConfig.class);
       AopServiceImpl aopService = ac.getBean(AopServiceImpl.class);
       aopService.sayOne();
    }
}

/**
 * 输出结果:这是One语句
 */
2
3
4
5
6
7
8
9
10
11
12
# 4、注解配置方式
创建接口及实现
增加注解@Service,交给Spring管理
// 接口
public interface AopService {
    public void sayOne();
}

// 实现
@Service
public class AopServiceImpl implements AopService {
    @Override
    public void sayOne() {
        System.out.println("这是One语句");
    }
}
2
3
4
5
6
7
8
9
10
11
12
13
测试获取aopServiceImpl对象
// 单元测试需要加@RunWith注解,正常应用中不需要
@RunWith(SpringJUnit4ClassRunner.class)
public class AopController {

    @Autowired
    private AopServiceImpl aopService;

    @Test
    public void testAop(){
       aopService.sayOne();
    }
}

/**
 * 输出结果:这是One语句
 */
2
3
4
5
6
7
8
9
10
11
12
13
14
15
16
# 5、SpringBoot托管配置方式
Spring Boot是一个开源的Java框架,它简化了基于Spring平台开发应用程序的过程。它提供了预设的模板,通过自动配置(auto-configuration)和约定大于配置(convention-over-configuration)的原则降低了开发者的配置负担。这让开发者可以专注于应用程序的功能开发,提高了开发效率。
Spring Boot的主要特点包括:
- 快速构建和简化配置:Spring Boot自动配置许多涉及安全性、数据库连接、嵌入式服务器等方面的参数,用户只需完成少量配置即可快速创建并运行一个完整的项目。
- 微服务支持:Spring Boot与Spring Cloud紧密集成,帮助开发者方便地构建微服务架构的应用程序。
- 使用嵌入式服务器:Spring Boot应用默认可以直接嵌入Tomcat或者Jetty等Web服务器,方便进行开发和部署。
- 外部化配置:Spring Boot支持将不同环境下的配置(如数据库参数或API密钥等)分离,使得应用程序在不同环境下的部署更加灵活。
- 应用监控:Spring Boot Actuator提供了许多开箱即用的端点(如应用状态、指标和日志等),方便开发者了解和监视应用程序的运行状态。
- 大量插件支持:Spring Boot支持许多插件和第三方库,用以简化各种开发任务,例如数据访问、安全性、缓存和社交功能等。
下面我们简单创建个SpringBoot项目看看Web项目,当然也可以学习完SpringMVC再来看这里做比较。
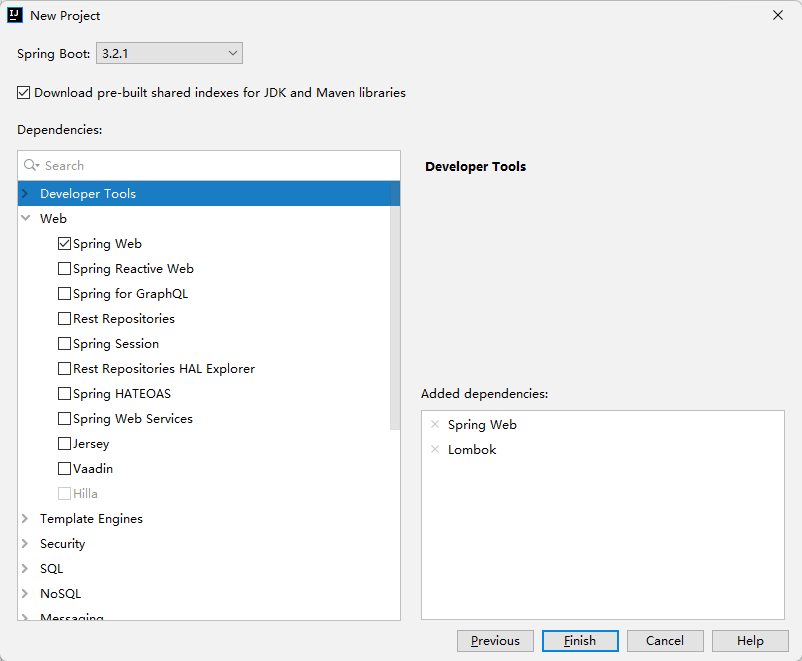
新建SpringBoot项目
新建项目

选择需要的依赖
最终项目结构
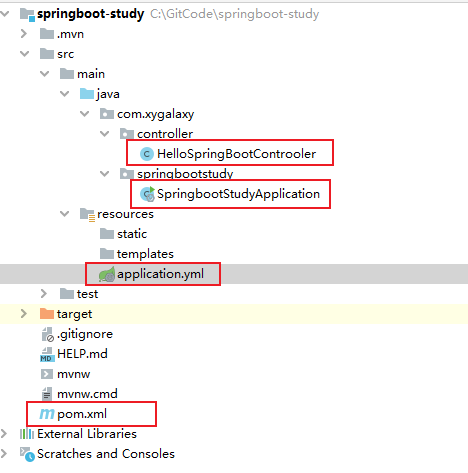
application.yml
server:
  port: 8085
2
HelloSpringBootControoler
@RestController
public class HelloSpringBootControoler {

    @GetMapping("/hello")
    public ResponseEntity<String> sayHello(){
        return new ResponseEntity<>("hello SpringBoot", HttpStatus.OK);
    }
}
2
3
4
5
6
7
8
SpringbootStudyApplication
@SpringBootApplication
@ComponentScan("com.xygalaxy")
public class SpringbootStudyApplication {

    public static void main(String[] args) {
        SpringApplication.run(SpringbootStudyApplication.class, args);
    }

}
2
3
4
5
6
7
8
9
pom.xml
<?xml version="1.0" encoding="UTF-8"?>
<project xmlns="http://maven.apache.org/POM/4.0.0" xmlns:xsi="http://www.w3.org/2001/XMLSchema-instance"
         xsi:schemaLocation="http://maven.apache.org/POM/4.0.0 https://maven.apache.org/xsd/maven-4.0.0.xsd">
    <modelVersion>4.0.0</modelVersion>
    <parent>
        <groupId>org.springframework.boot</groupId>
        <artifactId>spring-boot-starter-parent</artifactId>
        <version>3.2.1</version>
        <relativePath/> <!-- lookup parent from repository -->
    </parent>
    <groupId>com.xygalaxy</groupId>
    <artifactId>springboot-study</artifactId>
    <version>0.0.1-SNAPSHOT</version>
    <name>springboot-study</name>
    <description>springboot-study</description>

    <dependencies>
        <dependency>
            <groupId>org.springframework.boot</groupId>
            <artifactId>spring-boot-starter-web</artifactId>
        </dependency>

        <dependency>
            <groupId>org.projectlombok</groupId>
            <artifactId>lombok</artifactId>
            <optional>true</optional>
        </dependency>
        <dependency>
            <groupId>org.springframework.boot</groupId>
            <artifactId>spring-boot-starter-test</artifactId>
            <scope>test</scope>
        </dependency>
    </dependencies>

    <build>
        <plugins>
            <plugin>
                <groupId>org.springframework.boot</groupId>
                <artifactId>spring-boot-maven-plugin</artifactId>
                <configuration>
                    <excludes>
                        <exclude>
                            <groupId>org.projectlombok</groupId>
                            <artifactId>lombok</artifactId>
                        </exclude>
                    </excludes>
                </configuration>
            </plugin>
        </plugins>
    </build>

</project>
2
3
4
5
6
7
8
9
10
11
12
13
14
15
16
17
18
19
20
21
22
23
24
25
26
27
28
29
30
31
32
33
34
35
36
37
38
39
40
41
42
43
44
45
46
47
48
49
50
51
52
项目启动,这几个任意一个点击都可以启动

浏览器测试访问
http:/hello
<!-- 或者 -->
http:/hello
2
3
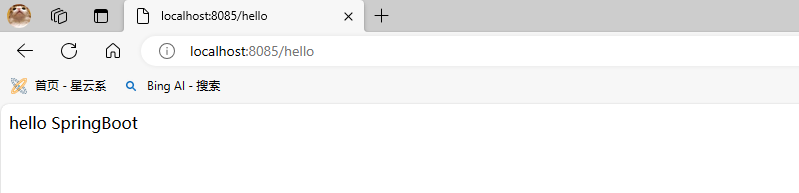
可以看出SpringBoot只需要很简单的配置就可以创建一个Web项目,不单是Web项目,其他的可以看SpringBoot章节。